How To Paint A Dew Drop In Watercolor

Realistic dew drops are impressive in a painting. They add that sense of freshness and realism that catches a viewer’s attention.
As the brilliant photographer, Cartier-Bresson would say, it creates a “decisive moment”… a moment in which you can’t look away because you are compelled to see what will happen next.
Steps to a Perfect Water Droplet
First, you need to understand what happens in the drop of water.
What are you seeing when you look at a drop of water? Water is denser than air so it can form a bubble. Think of the drop as a tiny structure; a dome or half a sphere.

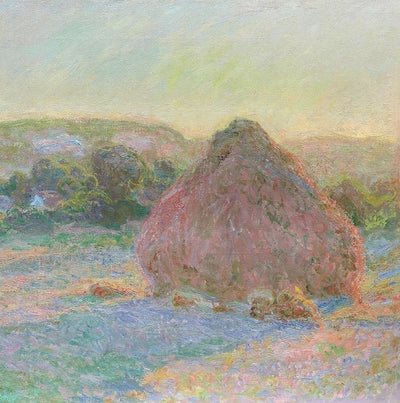
Let the Tulip Dance.
© Jane M. Mason.
A fine art print of this painting 22″ x 29″ is available from the artist.
The light entering into this little spherical structure is refracted or bent. Some of light reflects off the back wall of the structure. And, because the drop has mass, it creates a shadow. Often in the shadow there is more refracted light. That creates its own little highlight or sparkle in the shadow.
Rain, droplets of water, a mist or humidity in a sunny sky has light passing through each drop.
The light gets refracted and we see it as a rainbow.
Amazingly all this is happening in every dew drop, every raindrop, every splash of water that has light passing through it whether in a sky or on a tulip petal

Here is a photo of a seed pod. I sprayed water on it to form a spattering of droplets.
I suggest you do this, too, before you start painting. Take a picture of your droplets and keep it handy as you paint or draw to remind yourself how intricate and beautiful they are. If possible, move the light source into varying positions to see what happens within the droplets and in their reflections. You may wish to take several photos.

Notice on the seed pod that there are droplets hanging on the side. Also, the droplet is going to follow the curvature or the indents or unevenness of the surface it sits on. You can use this information to help define the object the drop sits on.


OK now that we’ve had a moment to reflect on the awesomeness of light, here’s my process for painting the water droplets. See this video for drawing dew drops. Also, see this video for more tips on painting fall leaves. Now back to my process...
- Decide where light is coming from. Light follows rules. So, if there is no light, there is no reflection.

- Paint a background: it can be an even or uneven wash. On the example I am painting step-by-step for you, I have painted the first layer of a tulip. I added a couple of leaves so a couple of drops could be hanging off the petals about to drop on the leaves. Let your background dry.


- Add an edge to your droplet. You can use a pencil, watercolor pencil, colored pencil or a gel ink pen. I used a gel pen. you want something that is sharp with a fairly fine point.
- Dome color. This is a darker shade of the ambient color; the color of the petal or leaf or seed pod. If often has a highlight in it. In my example on the tulip, I put a highlight in every dome, because it’s fun to do and I wanted to show you how to do it. Let this dry.

This is opposite the light source, (farther from the light source than the dark part of the dome). It is on the outside of the dome. Use a darker color of your background color. You can add an analogous color (color next to it on the color wheel, if you need more intensity. Or as in the tulip, in a couple places I added the complement on the color wheel since those were the two colors in the painting.
- Use a round brush to create the shadow and soften at the edges and the sides of the shadow. The angle of the light will determine how long the shadow is. You can figure it out scientifically, or just create it how you want it to look. Again, be consistent with the drops in the same area. Let this dry.
- Light part of the dome. This is where the light hits the “back wall” of the dome. This is opposite the light source, too. To create this light part of the structure, you can either leave some white as you start the painting. Or you can use a masking product, like Mastoid. Or just add a little white. I have tried it in many ways. Tulip-dew drop add dome shadows JMM I think it’s easiest to use a white gel pen or a white colored pencil and lightly add some white to the area to lighten it up.

- Reflection and Highlight. These are the little areas or white in the dark part of the dome, and in the shadow. You can scratch the paint off the surface of your paper with an Exacto® knife, or use masking. gel pen. colored pencil, and other tools. I like to keep it simple and use a colored pencil or a gel pen. Let this dry.

- Finish the painting by refining the details on the petals and the leaves, by emphasizing the line around the droplets if the lines have gotten lost in the painting. Hold the painting up to a mirror to see if you like how it looks. Even Leonardo da Vinci did this to check his composition and values. So there!
Note: if you have a goal of a painting created completely of transparent watercolor, you cannot use gel pen, colored pencil, pastels, white out or even gouache on your painting. I frequently enter paintings in the Transparent Watercolor Society of America exhibitions and so this is an important consideration for me. It’s perfectly fine to use these other media if you are not concerned about transparency.
Have fun with your droplets. Try them in various shapes and sizes.
Remember too that you will not believe the illusion until you put the highlights in. It’s the last major step, so just keep at it.
As an up-and-coming filmmaker I know, Graham T. Mason, said, “As the artist, you have the imagination of the viewer in your hand; you decide where you want to take them.” With a dew drop you can do that. You can grab the viewer’s imagination with your realistic droplets and guide their eyes through your painting. You have the power!
So, when someone asks you, “Dew you know how to paint a dew drop?” Now you can say, “yes”!

Here are some of the things you can use to add the highlights to your painting, or to add white to any watercolor.

From the bottom: white gel pen; American Journey Titanium white pigment stick; white pastel in a pencil form; white colored pencil, white watercolor pencil; Da Vinci Gouache (white titanium); nub of a white watercolor pencil; Dr. Ph Martins Bleed Proof White paint; and art maskoid, masking fluid to resist the paint and reserve the white of the paper. I forgot to include the Exacto® knife in my montage.
I always encourage people to visit their local art store for supplies. I don’t have a relationship in which I get paid for recommending products, so please buy the product that makes the most sense to you – and try to get it at an independent art supply store. Here are the tools I use in this blog post:
- Gel Pens White – Uni-Ball UM 153 Signo Broad Point.
- Stephen Quiller, Jack Richeson Quiller Covered Travel Palette.
- Arches Watercolor Cold Pressed Paper Block 140# 20 Sheets-9×12”.
- Daniel Smith 285610005 Extra Fine Essentials Introductory Watercolor, 6 Tubes.
- The Essentials Set has three cool primary colors: Hansa Yellow Light, Quinacridone Rose, and Phthalo Blue (GS), and three warm primary colors: New Gamboge, Pyrrol Scarlet, and French Ultramarine.
- Daniel Smith Extra Fine Watercolor Sticks (Titanium White).
- Winsor & Newton Designer Gouache, White, 14ml tube.
- Grafix 4-1/2-Ounce Incredible White Mask Liquid Frisket.
- Derwent Watercolor Pencil Tin, 12-Pack.
- Prismacolor Colored Pencils, 72 count.
- Dr. Ph. Martin’s Bleedproof White, 1.0 oz.
Interested in a greeting card featuring dew drops? Take a look at my Butterflies and Zinnias design.
Did you like this information? All of my blog posts start as an e-letter and my next e-letter is due out soon. Don't miss out!


Send a message or leave a comment